
Table of Contents
SMD Reflow Oven

| Status | Working as of Feb 3 , 2017 |
|---|---|
| Training | Recommended |
| Hackable | NO |
| Usage Restrictions | Members Only |
| Owner | VHS |
| If it Breaks | Unplug machine, put a “broken” sign on machine, contact PacketBob. |
| Loan Status | Owned |
| Arrival Date | Feb 2017 (New Controller July 2021) |
| Location | Soldering Bench C3 |
| Value | $$ |
| Champion | See Compendium of Champions |
Information
VHS now has a SMD Reflow Oven that is sitting in the soldering section (looking like a mild mannered toaster oven)…
The oven is based the design found here: https://www.whizoo.com/reflowoven
It has recently been upgraded to a new ControLeo3 touch screen controller (https://www.whizoo.com/) that features a touch screen and allows for multiple profiles. This lets you store different profiles for using different types of solder.
While I didn't document the build of this oven, it is very similar to the one I originally built for myself and you can find the Instructable for it right here: https://www.instructables.com/Making-A-SMD-Reflow-Oven/
While you are at it you should also check out my Instructable for setting up a solder paste dispenser: https://www.instructables.com/How-to-set-up-repair-adjust-and-use-a-solder-paste/ We don't have one at the Space (yet) but it has some basic info on SMD soldering using the oven
The oven currently has two profiles configured (#1 - Lead free paste 250C or Leaded Paste 225C). The oven can have 28 different profiles added using the SD card. Refer to this page for information on creating more: https://www.whizoo.com/profiles
Basic Instructions:
1) Turn on power using the red POWER switch located on the lower right side of the oven.
2) The LCD touch screen should show this (if not then hit the HOME icon on the bottom of the screen).

3) To start baking your PCB select the Profiles button.
4) Confirm you have the correct profile set (if not then hit the Choose Profile button and use the green arrows to select the desired profile, then use the Back Arrow to return to the above menu).

5) Open the oven door.
6) Place your PCB on the metal tray (in the center).
7) Make sure you are happy with the parts placement.
8) Slide the tray into the oven.
9) Close the oven door.
10) Select the Run Profile button and the oven will start the reflow cycle. The screen will show the progress on a small graph.

11) Once the reflow cycle is completed the oven will open the door to allow the oven to cool.
12) Once the oven has cooled to 100C the oven screen will say it is OK to remove your PCB Note that you need to use tweezers as the boards will be hot… Really really hot… Like burn your friggin fingers even though you should know better hot…

13) Once the oven has cooled to 50C the oven door closes. This is a better time to remove your PCB.

14) Close the door and turn off the oven if you are done.
15) If you have another bake to do then you need to wait till the oven temperature drops to 50C before you can start another bake cycle.
Advanced Instructions:
Bake Mode - An added feature of this controller is the ability to bake at a set temperature for a set period of time. Handy if you need to heat stress test something or dry out components (please do not try to bake cookies unless you feel you need extra heavy metal in your diet… which you don't….) Use the Bake button to open a menu that lets you select a temperature and duration
Caveats/Stuff:
Touch on the temperature reading to change it from C to F (or back again)
The unit will not let you do another bake till the oven cools to below 50C. Once the oven cools to 100C you can remove your board (with tweezers or something cuz it will burn you) and then aim a fan into the oven to aid in cooling it down.
Do not use this oven for heating food. It is full of lead and other heavy metal residue.
Do not lick the inside of this oven (see above). In general I recommend copious hand washing when dealing with solder paste.
Do not leave the oven running unattended while baking. While I did install a high temperature cutout (to shut off power should the oven get too hot) this will not stop a fire should your board decide to shoot out flames.
If you need to cancel a bake cycle just press the STOP button on the display
If you find the tray getting sticky (with flux) then use some Isopropyl Alcohol and a cloth to clean it. Make sure the alcohol has dried before using the oven.
Feel free to contact me if you have any questions/comments/complaints/whatever.
Here are some tech pictures should you have your geek on (and really, why would you be reading a thread on a reflow oven if you didn't)
Inside Wiring:

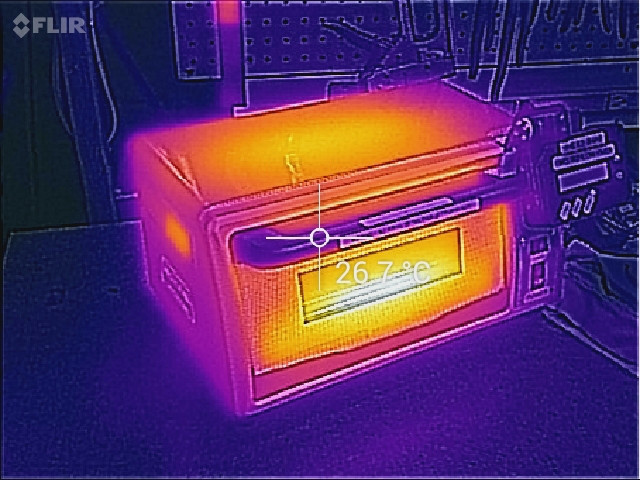
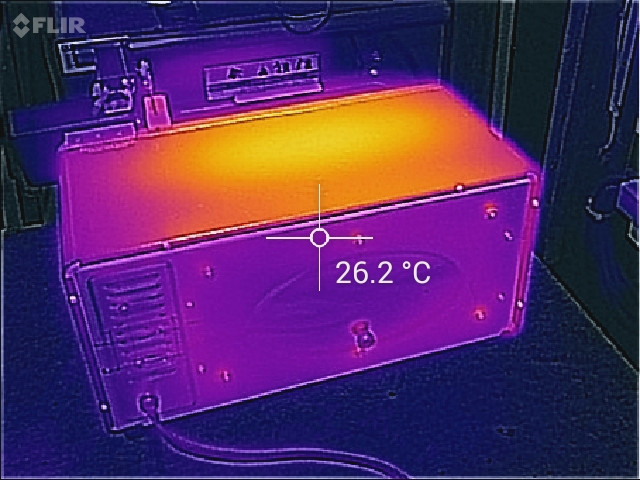
Some IR Views Showing Heat Dissipation (cuz I had access to a FLIR camera)…
Front:
Back:
Tray (door was opened after a bake cycle showing pretty even heating):
