
This is an old revision of the document!
Table of Contents
This tutorial is a work in progress and will be updated as I get more screenshots and images. I am by no means an expert and if you know of a better way, feel free to join us in the Talk thread.
The purpose of this tutorial is to walk you through the steps required to convert a full color image into something the laser cutter can work with to etch the image. For the sake of this tutorial, I am using Gimp which is a free alternative to Photoshop, an image I found on Google Images, and 6mm baltic birch from Windsor Plywood. The power settings I suggest are low enough that they should work just fine for 3mm if that is what you have on hand, but feel free to use up a piece of scrap from on top of the material storage to try this. You will only need a piece that measures 3.5“ x 7” so there will almost certainly be a piece big enough there to try this for free.
Index
- Basic step-by-step walkthrough for those who are looking for an answer
- Importing the image into LaserCAD and making the cut
- Advanced image prep discussion for those who actually want to experiment and play around with the process.
Basic Image Prep
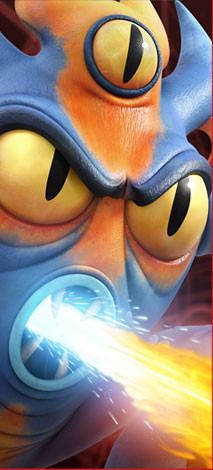
Here is the base image we are going to work from, which some of you may recognize as Fred from the movie Big Hero Six, and the finished result.
Prepare the image After finding the image you want to etch, the next step is to convert it into an image that our laser can recognize and work with. Open the image up in Gimp. You can scale it [on the menu bar, click Image then Scale Image], crop it using the tool that looks like an X-Acto knife, and do whatever else you have to do to get ready.
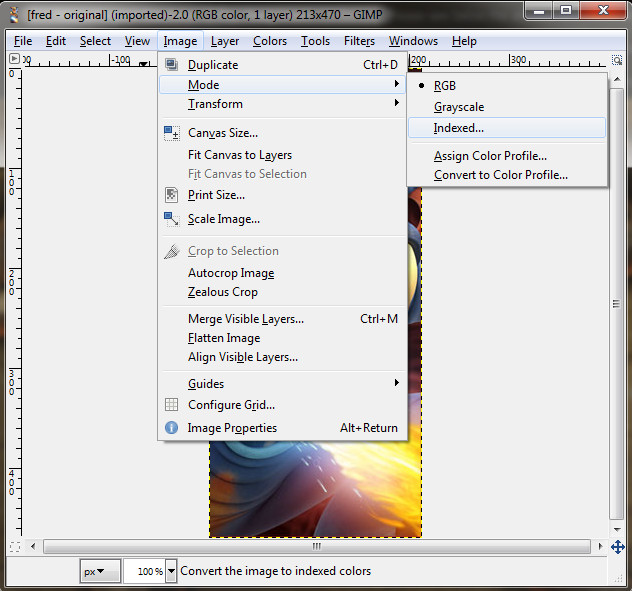
Once you are ready to move on, we get to the fun part. Getting just the right settings for this step might take some experimentation so I am going to include images of my tests as we go. Click on Image > Mode > Indexed
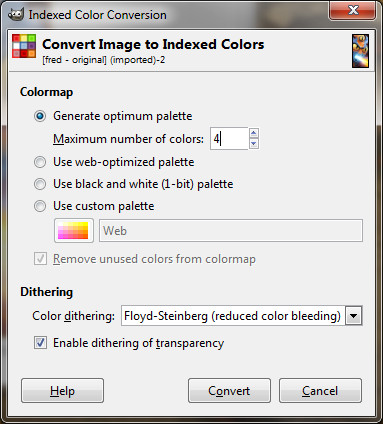
You will get a popup that looks like this:
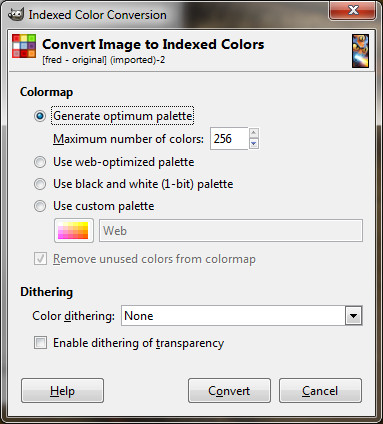
I will give examples later of what the various settings look like, but for now, I suggest starting with maximum of 4 colors and enabling the Floyd-Steinberg dithering like so:
For those playing along at home, your image will now look like this:

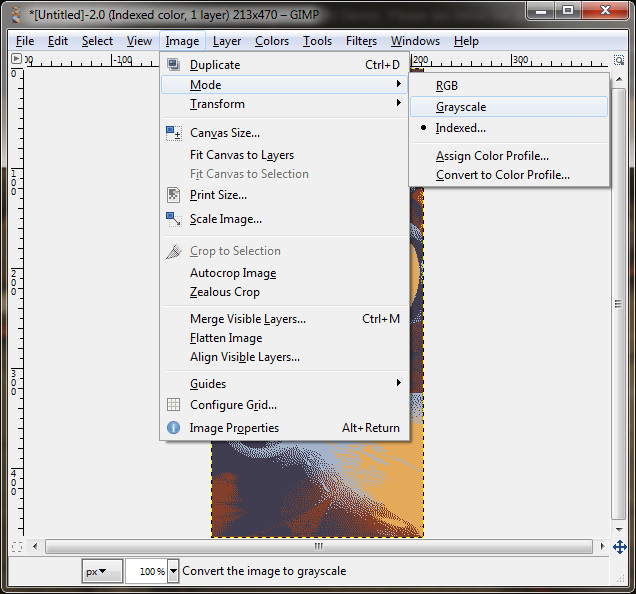
The next step is to convert that to a greyscale image that the laser can use by going to Image > Mode > Greyscale
Your image should now look like this. Export it as a jpg and it will be ready to import into LaserCAD!

LaserCAD
This part is surprisingly easy once the artwork is prepped correctly. Open LaserCAD and import the jpg image:

It will look horrible and distorted, trust in the force.

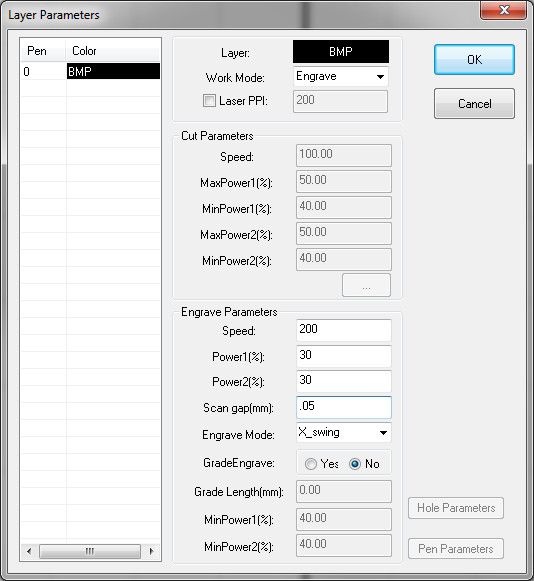
Things to note are that where you normally see a color swatch on the “Layer Options” section where you pick your power settings, you now have a row for “BMP” with the mode set to “Engrave”.
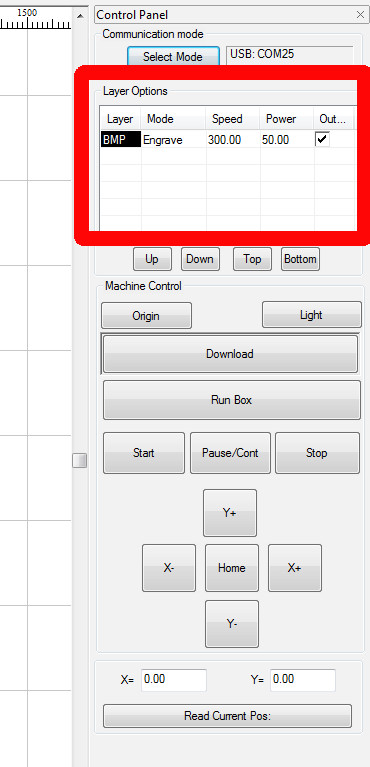
Double click on there to open your Layer Parameters menu where you will set your power and speed:
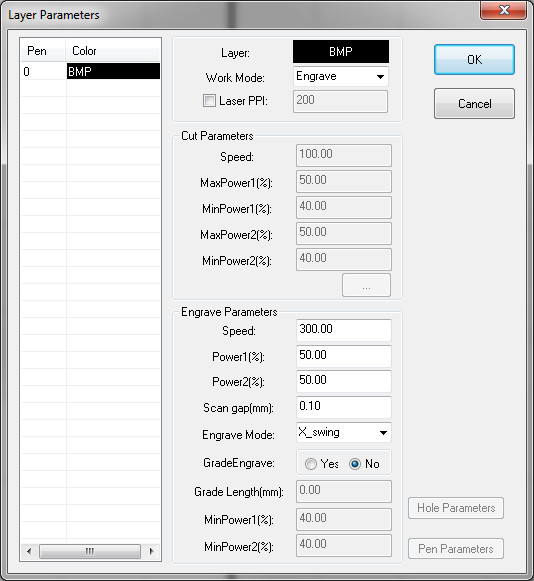
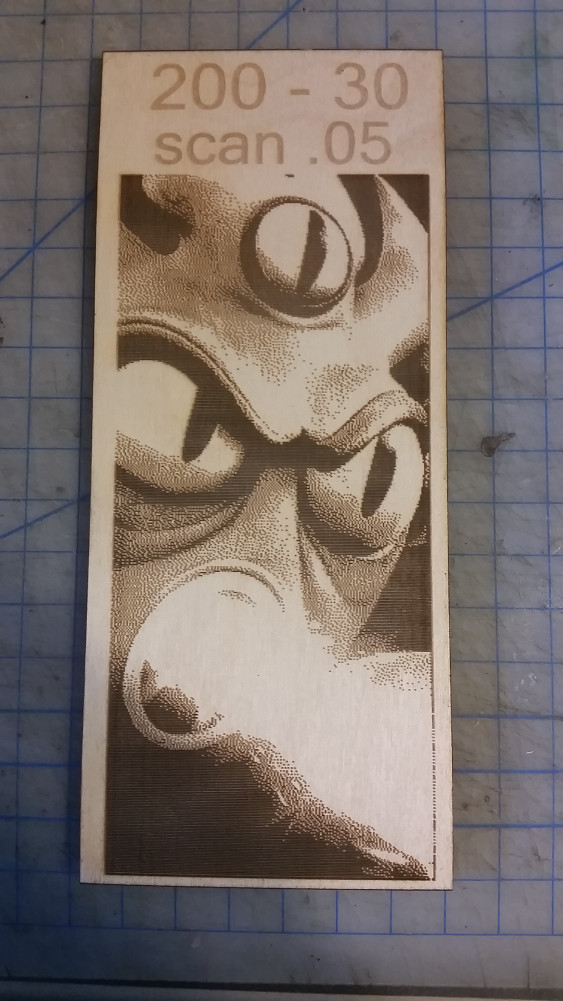
The advanced section will go into detail on how I came up with these settings but for this project change the speed to 200, power1 and power2 to 30, and scan gap to 0.05 and click OK.
Now you might want to use the rectangle tool to make a box around the art and set the power for that to whatever you need to use to cut through the material in order to give it a nice clean cut. From here it is exactly like any other laser project. Download your file to the laser, run a box to align the material, hit start, and enjoy. This file with these settings will end up with a piece measuring roughly 3.5“x7” and will take around 20 minutes or so to run. Enjoy!
Advanced Image Prep
This section will not be a step by step walkthrough so much as a discussion on how came up with the numbers in the preceding steps in case you want to take this further and try with different images.
Where to go from here
- My next step is going to be a much larger image which suspect will require multiple sections at different index settings in order to get the most “resolution” out of the final etch.
- How to add some detail back in to the image by layering in some vector lines to etch as accents and detail lines, such as breaking up the solid mass of flames and making the lips/mouth more distinct in the image we used here
- How will this look on leather? It could make a REALLY fun project to etch art like this for a leather wallet